Inquiry Activity Summary
1) 30 Degree Right Triangle

Here we have the 30 degree triangle. In the picture above we see the steps to labeling and finding the vertices of a special right triangle known as the 30-60-90 right triangle. The first thing to do is to label it according to the rules of special right triangles. This step is done in purple. It is the labeling of the vertical side, horizontal side, and the hypotenuse with the right values. The hypotenuse is labeled as 2x, the horizontal values is x radical 3, and the vertical value is simply x. The next thing that you need to do is make the hypotenuse equal to the value of one. To do this you need to divide each side by the value of the hypotenuse (2x). This step is done in green. When you divide each value by 2x your new values become 1 for the hypotenuse, radical 3 over 2 for your horizontal value, and you get 1/2 for your vertical value. After you have the new values you can label the triangle with the variables r,x, and y. When you do this you label the hypotenuse r, the horizontal side x, and the vertical value y. You then create a small chart with the new variable and the previously found value to make sure everything is clear. That step is done in red. Then you draw a graph so that the triangle is located in the first quadrant. Make the 30 degree angle the vertex with an ordered pair of (0,0). The 90 degree angle will be the horizontal value, zero-(radical 3/2, 0) and the point at the 60 degree mark as the horizontal value, vertical value- (radical 3/2, 1/2). This last value is the first mark on the unit circle.
2) 45 Degree Right Triangle

This is also a special right triangle. This one is known as the 45-45-90 triangle. The steps to solving this one are the same as the last, but the numbers are different than the last one. The first step is to label the sides according the rules of a special right triangle. The hypotenuse is to be labeled x radical 2. The vertical side is to be labeled x and so is the horizontal side. After that you want to reduce the hypotenuse to be equal to one. To do so divide every side by the value of the hypotenuse (x radical 2). The new values are shown in green. You get the hypotenuse to be 1, the vertical and horizontal sides (because they had the same value) become radical 2/2. This is done because when you divide by a radical you must rationalize it because radicals do not belong in the denominator. To do this you multiply it by radical 2 over radical 2. After that you label the sides with the variables of r,,x, and y. Label the hypotenuse r, the horizontal side x, and the vertical side y. After you do that create a small table matching the variable and the new value together. This is shown in red in the photo above. The r is equal to 1, the x any y are equal to radical 2/ 2. The next thing you do is to draw a graph so that you place the triangle in the first quadrant. Make the bottom 45 degree angle the origin with an ordered pair of (0,0). Then you move to the 90 degrees and label it as the horizontal value and zero (that is the distance that you have moved). The ordered pair is (radical 2/2, 0). The top 45 degree angle has an ordered pair of the horizontal value and the vertical value, making it (radical 2/2, radical 2/2). That is all that is to it, This last ordered pair then becomes the second set of pairs on the unit circle. Very important to understand.
3) 60 Degree Right Triangle

4) Derivation of the Unit Circle Assistance
This activity helps you derive the unit circle because these three triangles are used for the whole circle. The top ordered pair for each triangle can be seen in each quadrant once. The values remain the same except the signs will change depending on the quadrant. From this picture though you can see how the ordered pairs keep on reappearing in the circle. The triangles make the circle a reality. The triangles in each quadrant are found the same way as the first quadrant. This works because as you move in the revolution of the circle, the larger degrees have the reference angles of the special right triangles. This is seen in the photo above. The triangles are the same in each quadrant. Below is a video that shows this happening. The person doing this is showing how no matter where you are in the circle you will have these right triangles seen. When you see that reference angle that has that 30 degrees or that 45 degrees or the 60 degrees you can follow the rules and know the ordered pair for that angle. The second video goes into details describing how the patterns are seen and where they are located in each quadrant. Both producers of the videos are showing that the right triangles are located in each quadrant just sitting in different positions.
 |
(http://jwilson.coe.uga.edu/EMT668/EMAT6680.2001/Bruce/instructunit/day_3.htm) (http://en.wikiversity.org/wiki/Polar_Coordinates) |
5) Other Quadrants
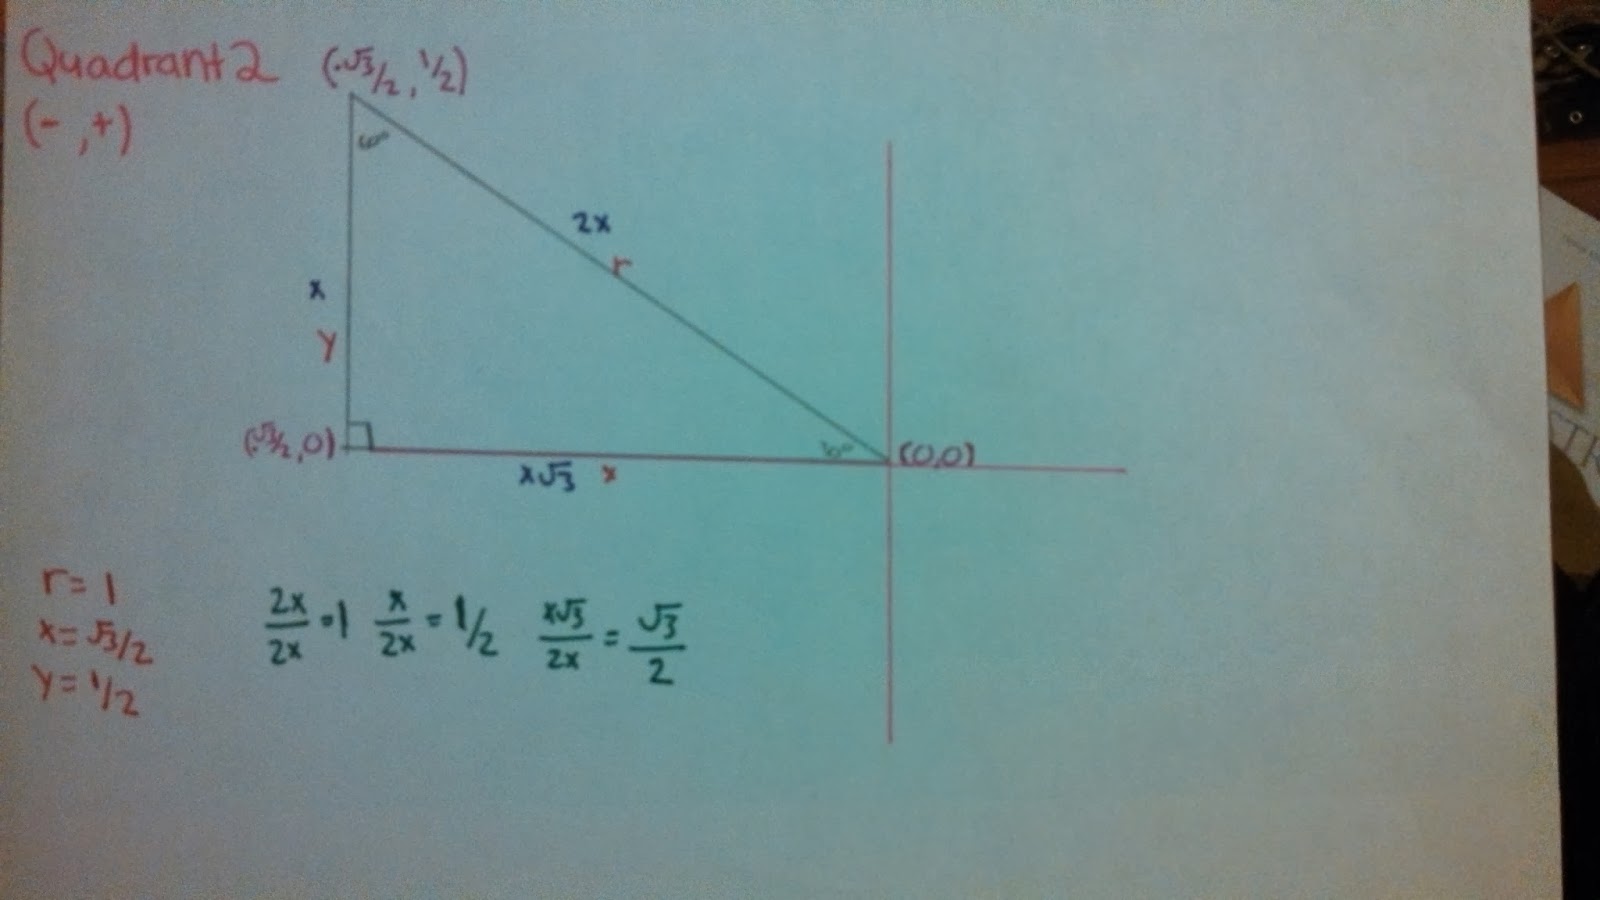


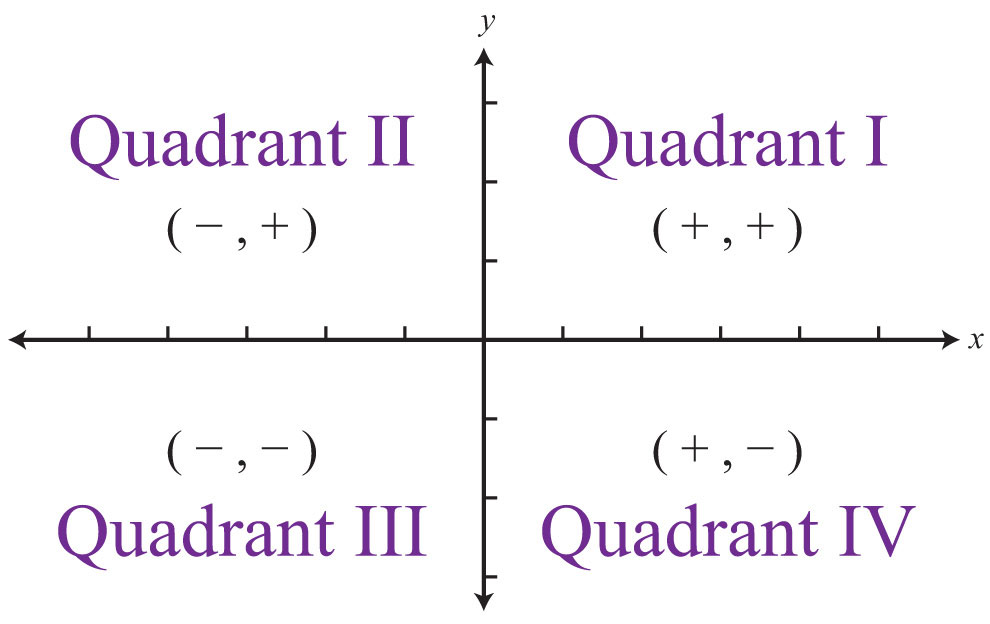
In the different quadrants the only thing about the triangles that change are that the ordered pairs will contain one or two negative values. That is due to the location of the triangle though. We know that in quadrant one they are both positive. In quadrant two the x value is negative and the y value is positive. In the third quadrant both the values are negative and in the fourth quadrant. Those are the only things that are different in the other quadrants. Nothing else changes. If you look at the images above and compare them to the quadrant one pictures you will notice that each one is identical in the process of finding it and the only thing that changes is the sign of the ordered pair. The reason that happens is it is adjusting to the different quadrant locations. Nothing else is happening to them.
Inquiry Activity Reflection
The coolest thing I learned from this activity was that the right triangles work in all the different quadrants and that the relationship is there. I slowly realized it last year, but I was more focused on simply passing the exam last year to really appreciate it. It Is actually a very interesting thing to understand and get to use. It was very cool to learn.
This activity will help me in this unit because it will allow me to understand and easily place the ordered pairs for the triangles in the different quadrants. By doing this activity I can figure out where the triangles are in the different quadrants if I forget the pattern. This activity has allowed me to have the tools to derive the circle if I need to in a given situation.
Something I never realized before about special right triangles and the unit circle is that they were all interlocking. They work for all of the quadrants and not just the first one. I knew they worked in the first one for sure, but seeing how they worked in the other quadrants was really interesting to see. I did not fully realize that until after completing the activity. It is important to deriving the unit circle and 3 days ago I learned that. Thank you Special Right Triangles!
Resources
http://www.mathsisfun.com/geometry/unit-circle.html
Resources
http://www.mathsisfun.com/geometry/unit-circle.html
No comments:
Post a Comment